Download and Install VS Code on Windows fast. Visual Studio Code (VS Code) is a free, powerful, and lightweight source-code editor developed by Microsoft. It is one of the most popular tools among developers for a wide range of tasks, supporting everything from web development to data science, thanks to its extensive ecosystem of extensions.
This comprehensive, step-by-step guide will walk you through the entire process of downloading the official installer and completing the setup to install VS Code on any Windows operating system (Windows 11, 10, etc.).
Let’s begin the installation.
Step by Step Guide
First: Download the Installer
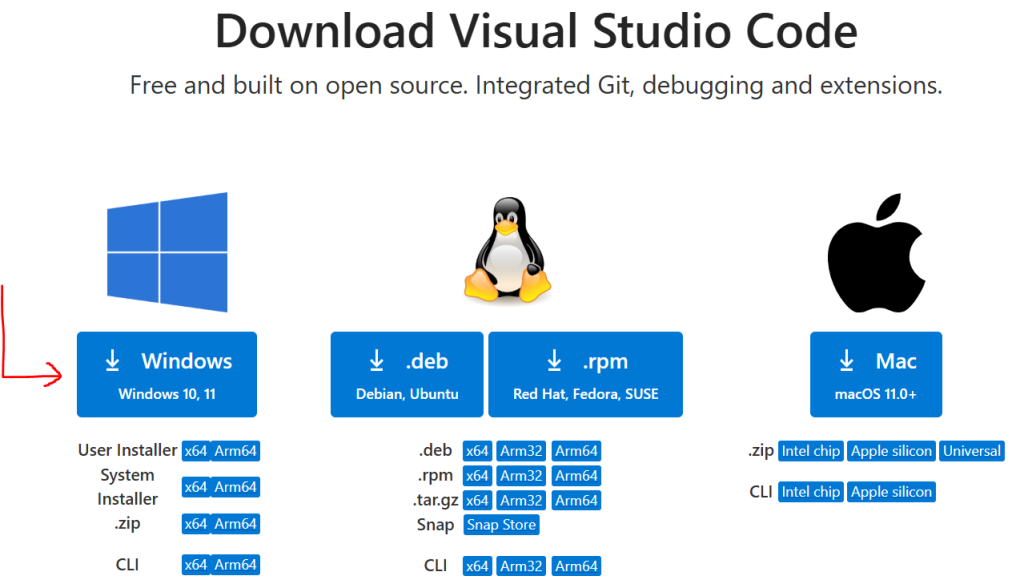
- Visit the official VS Code website: Open your web browser and go to the official Visual Studio Code download page https://code.visualstudio.com/download to download and install VS Code on Windows.
- Download for Windows: Under the Windows section, click on the download link for the User Installer (usually a “VSCodeUserSetup-x64-*.exe” file for 64-bit systems, which is the most common). The User Installer is generally preferred as it doesn’t require administrator privileges for updates.
Second: Run the Installer
- Locate the downloaded file: Once the download is complete, navigate to your Downloads folder and double-click the installer file (e.g., VSCodeUserSetup-x64-*.exe) to start the setup.
Third: Follow the Installation Wizard
- Accept the Agreement: Read the License Agreement and select “I accept the agreement,” then click Next.
- Choose Installation Location: The default installation path is usually fine. Click Next to proceed.
- Select Start Menu Folder: Accept the default Start Menu folder name or change it if you prefer. Click Next.
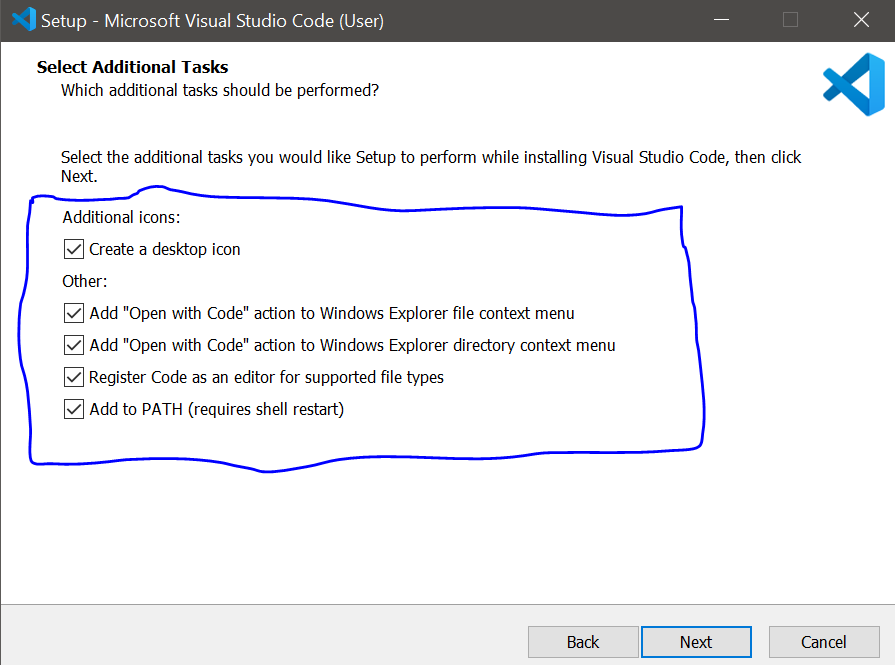
- Select Additional Tasks (Important): This screen allows you to select optional but highly recommended settings:
- Check the box for “Add to PATH (requires shell restart)”. This is very useful as it lets you open VS Code from the command line in any folder by simply typing code ..
- You can also check boxes for “Create a desktop icon,” and the “Open with Code actions for the Windows Explorer context menu” (right-click menu) if you want to quickly open files or folders in VS Code.
- Click Next after making your selections.
- Review and Install: Review the chosen settings on the summary screen, then click Install.
Fourth: Finish Installation and Launch
- Wait for completion: The installation process will take a minute or two.
- Finish: Once the installation is finished, you can check the box for “Launch Visual Studio Code” (if it’s not already checked) and click Finish.
See also: How to download and install Python on Windows
Conclusion and Next Steps
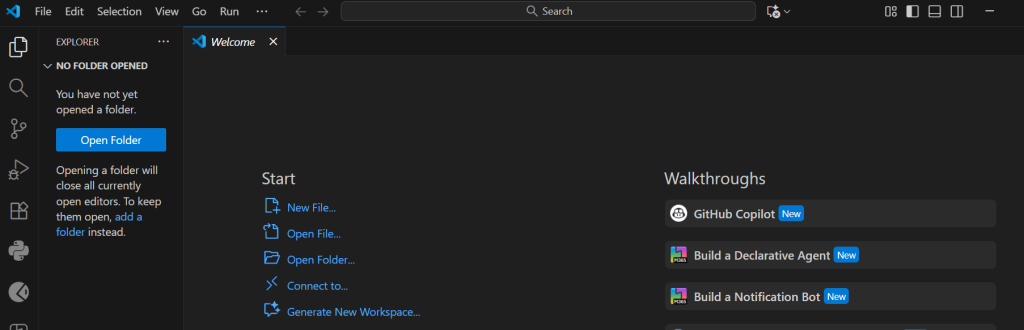
Congratulations! You have successfully downloaded and installed Visual Studio Code on your Windows system.
VS Code is now ready to use, and you can open it either by clicking the desktop icon (if you created one) or by searching for it in the Start Menu.
Your next steps will typically involve:
- Installing Extensions: Head to the Extensions view (the square icon on the left sidebar) to find tools for your specific programming language (like Python, JavaScript, C++, etc.).
- Learning the Interface: Explore the welcome screen and built-in tutorials to quickly familiarize yourself with the panels, commands, and settings.
- Start Coding! You can begin a new project by selecting File > Open Folder and creating your first code file.