
To download and install Python on Windows, you’ll need to go to the official Python website, download the appropriate installer, and then run it. The installation process is straightforward and typically includes adding Python to your system’s PATH, which is a crucial step for using Python from the command line.
Step by Step Guide:
First: Download the Python Installer
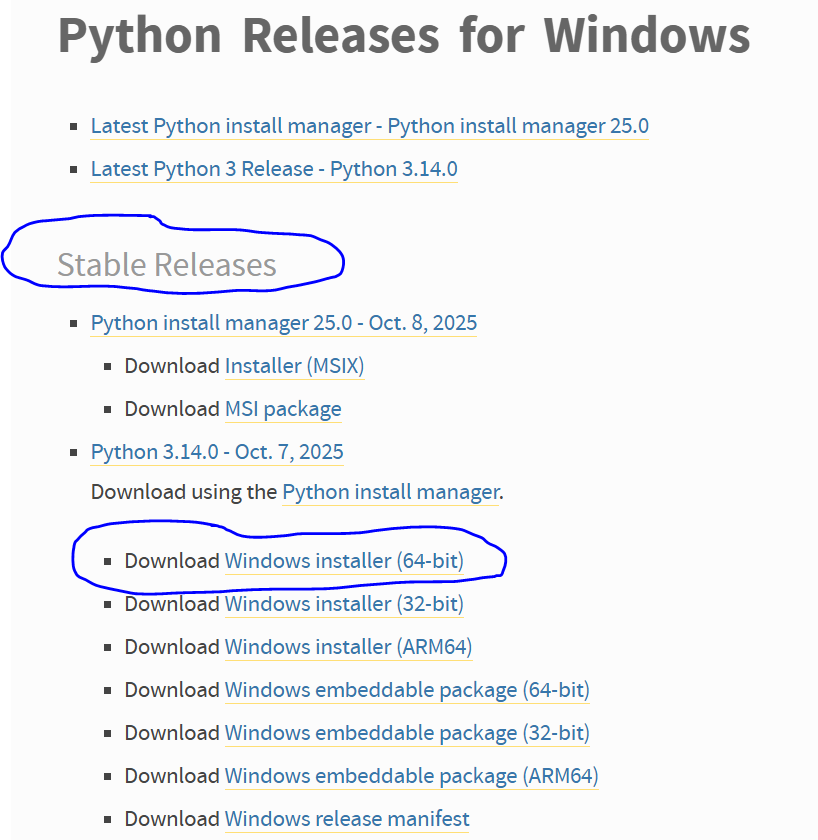
- Open your web browser and go to the official Python download page: https://www.python.org/downloads/windows/
- The website will automatically detect your operating system. Look for the latest stable release for Windows. It’s usually a prominent button at the top of the page.
- Click the link to download the “Windows installer”. Make sure to choose the 64-bit installer if you have a 64-bit operating system, which is standard for most modern computers. If you’re unsure, you can check your system type by going to Settings > System > About.
- The file, which will have a .exe extension, will begin downloading. Save it to a location you can easily find, like your “Downloads” folder or your “Documents” folder.
Second: Run the Installer and Configure Installation
- Once the download is complete, double-click the downloaded .exe file to start the installation.
- A new window will pop up. At the very bottom of the installer window, you’ll see a checkbox that says “Add python.exe to PATH.” This is a very important step. Make sure this box is checked.
- Why is this important? Adding Python to your PATH environment variable allows you to run Python commands directly from the Command Prompt (CMD) or PowerShell, regardless of which directory you’re currently in. If you don’t check this box, you’ll have to manually navigate to the Python installation directory every time you want to use it, which is inconvenient.
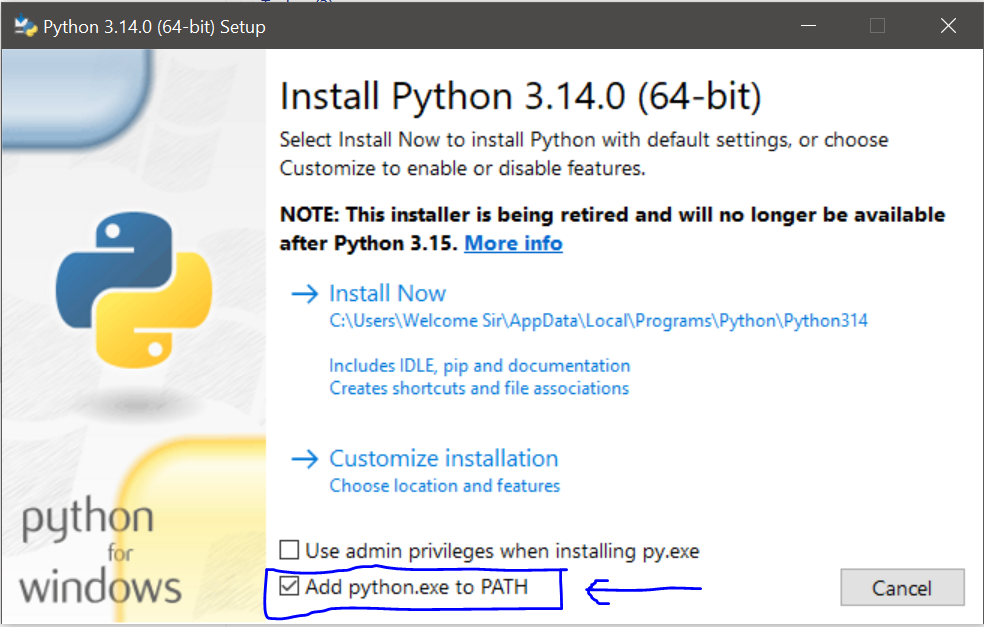
- After checking the box, you have two installation options:
- “Install Now”: This is the recommended option for most users. It will perform a default installation in a standard location.
- “Customize installation”: This option allows you to change the installation location, select which components to install (like documentation or pip), and other advanced settings. Unless you have a specific reason to customize, choose “Install Now”.
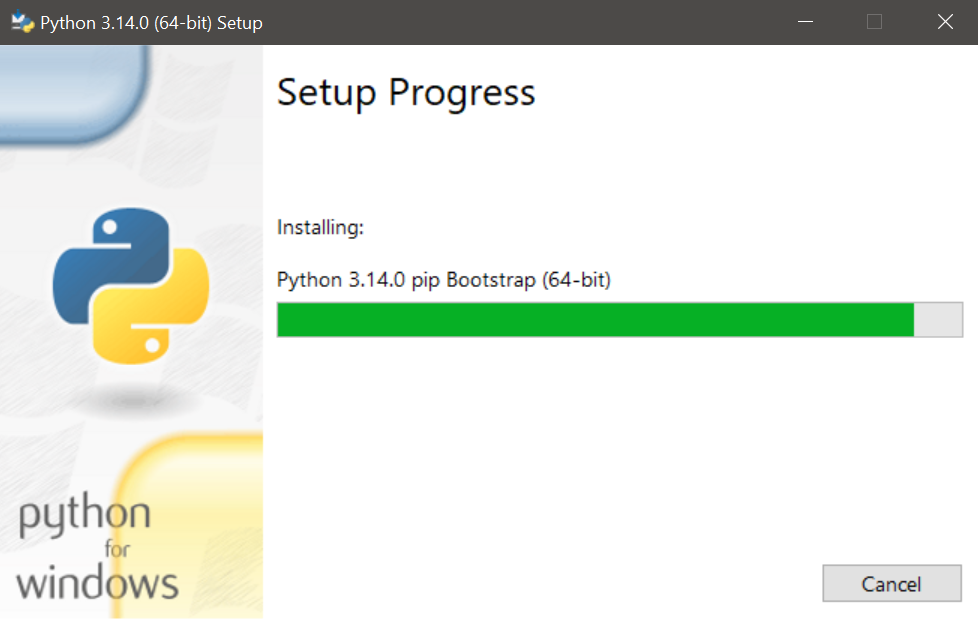
- The installation will begin. You might see a “User Account Control” prompt asking for permission to make changes to your device. Click “Yes” to continue.
Third: Verify the Installation
- After the installation is finished, you will see a screen that says “Setup was successful”. You can click “Close”.
- To confirm that Python was installed correctly and added to your PATH, open the Command Prompt or PowerShell. You can do this by pressing the Windows key, typing cmd or powershell, and hitting Enter.
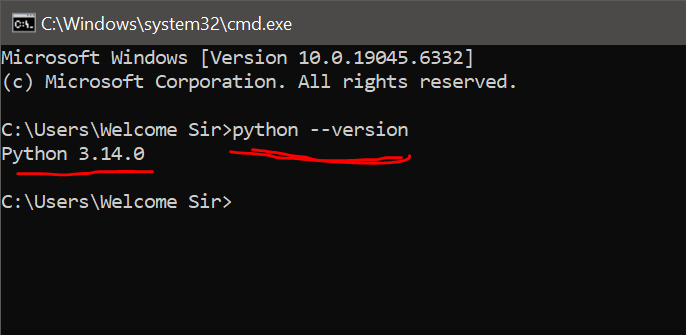
- In the terminal window, type the following command and press Enter:
C:\Users\user> python –version - If the installation was successful, the command will display the installed Python version (e.g., Python 3.13.7). This means you are ready to start using Python!
See more: Top 10 Applications of Python Programming Language
Conclusion: You’re Ready to Code!
Congratulations! You have successfully downloaded and installed Python on your Windows machine.
By following these steps, first of all, you’ve not only set up the core Python interpreter but also configured your system’s PATH, which is a crucial step for a seamless development experience.
Next, now that Python is installed, you can start writing and running your own Python scripts. In addition, you can install third-party packages using pip and explore the vast world of Python programming
Finally, if you encounter any issues, remember that the official Python website and community forums are excellent resources for troubleshooting and further learning. Happy coding!


1 thought on “How to Download and Install Python on Windows in 3 Simple Steps”
Your point of view caught my eye and was very interesting. Thanks. I have a question for you. https://accounts.binance.info/sk/register-person?ref=WKAGBF7Y